Saturday, April 29, 2006

Puppets feed


What is puppets feed?
Right now it is an experiment. The experiment has just began. It displays the latest feeds from the web's most widely read puppetry blogs all in one place. At this moment there are just a few feeds to try the whole thing. Keep checking them and if you don't have an RSS reader, definatelly get one. Worth a look.

Friday, April 28, 2006

Vidcasting Tutorial Part 1

Although this doesn't have to do anything with puppets, it does apply to this blog. My main reason to starting a blog is because in the near future I want to get into vidcasting. Follow this Tutorial link, to get some basic ideas on doing your own vidcast. The information is provided by Filmosity Productions. Hope you enjoy it and get something out of it.

Thursday, April 27, 2006

MaMaMiA the finished 4th Puppet completed

Builder: Carlos's Oldest child @ http://video567.blogspot.com/Pattern: The Rotondo Puppet Pattern
Character: MaMaMiA
She is a human puppet who has a brown shaggy hair and always wears a bandana to cover up her mated shaggy hair. She is a teenager who is very talented in the ways of cooking, she is also dating Zac the pink Mohawk puppet. She is very dramatic, loves to praise others and offers advice when people seek her, and mimics every one to lighten the mood.

Technical: There where no deviations to the pattern, this being the 4th foam puppet, but most of the work was done by one of my child. This is her first Puppet, so we did not change the pattern in any way. I helped her by putting final touches to MaMaMiA like sewing areas that she left open and gluing a few parts to the foam head. Her hoodie shirt coat came from a thrift shop and the fur for her hair was already purchased a few years ago for a previous project that was never completed and was also used on the Zac puppet. We used 1/2-inch foam for the body and head. The eyes where made from googoly eyes uses for home made dolls and the nose was an eye we cut open to use the black circle as her nose. - Carlos


Wednesday, April 26, 2006

My oldest kid's puppet / our 4th

So it's not officially finished, but it is almost there. I am so excited she has gotten this much done. When I first started making this puppets, she didn't seem that interested. Little by little she started working on her creation. I did help her somewhat, some sewing and gluing there. Like my other kid's puppet she did 99% of it. I am very proud!

Puppet Patterns - Puppet Materials - Shop for hand puppet pattern kits and puppet making supplies.

Puppet Patterns - Puppet Materials - Shop for hand puppet pattern kits and puppet making supplies.: "Sock Search - The Glorified Sock Puppet Contest


Sock Search - The Glorified Sock Puppet Contest is here! Puppet builders from around the globe will enter photos of their original puppet characters, built from The Glorified Sock Puppet Pattern, and compete for the grand prize - The Forma Trio or $150.00 USD credit with Project Puppet. Entries will be accepted through May 28, 2006.

For an overview of the rules of the contest, click here.
Click here for the complete contest rules.

You could be the next international 'sock' star! "

Tuesday, April 25, 2006

4th Foam Puppet

So I am waiting for my olders kid to finish her first puppet. But I also wanted to post some pictures of her progress from a few days ago. She already has the body finished and she is decorationg it today. Once she is happy with it I will add the final pictures for all to see. She is very excited.


Monday, April 24, 2006

Playing with stop motion

One of my other hobbies is learning stop motion animation. Although this did not turn out like I expected, it was a fun little project and I had a great time doing it.

I was trying to do some stop motion and some green screen at the same time. I messed up by having my lego too close to the back ground and not adding proper lighting. I did the background in Cinema 4D but I should have made it longer. It was only an experiment in stop motion so I am some what happy with it. This proves I still have a lot more to learn.

Hoey

Pattern: The Rotondo Puppet Pattern
Character: Hoey
She is a monster puppet and has a weird sense of humor. She looks so innocent, but likes to play adult jokes, you would never guess she is 21 years old. She likes to shock people with her comments and gets people to argue with her all the time. She thinks she is never wrong and has to have the last word in everything she says.
Technical: There where no deviations to the pattern, this being my 2nd foam puppet I still don't have the confidence to change it around. I went to Walmart and purchased her fur, it was a bit pricey at $9.98 for the yard. Luckily I only needed 1 yard for her. Her dress came from a thrift store and she wanted a Disney design to fool people into thinking she is a nice monster. I used 1/2-inch foam. The eyes where made from foam balls cut in half and the black in her yes where cut from some moving eyes I bought at Michaels. I also found some doll eye lashes at the store that I cut to size and glued to the eye balls.


ZAC is finished

Pattern: The Rotondo Puppet Pattern
Character: ZAC
He is a monster puppet who has a pink Mohawk. He is a rocker, but also likes baseball and is on a local team. He is also 21 years old. Not only does he like Rock music, but he likes all kinds of music including Rap. He likes to go to the schools and loves the attention he gets. He steals the show every time.
Technical: There where no deviations to the pattern, this being my 3rd foam puppet, but most of the work was done by one of my children. Her first Puppet, so we did not change the pattern in any way. I helped her by putting final touches to ZAC, like sewing areas that she left open and gluing a few parts like the Mohawk. His coat came from a thrift shop and the fur was already purchased a few years ago for a previous project that was never completed. We used 1/2-inch foam for the body and head. The eyes where made from foam balls cut in half and the black in his eyes where cut from some moving eyes I bought at Michaels.


Sunday, April 23, 2006

Stupid SciFi

I am a big Sci-Fi fan I used to be Jedi Los on a little website called SABERS PLUS 2000 and now with puppets being my new passion finding this site is amazing. Great way to combine 2 loves into one. Go check them out!

Stupid SciFi: "We want you...To be a part of StupidSciFi!
This site is all about you...The SciFi Fans! We need your help to keep this site updated with the latest News and Information about your favorite shows, movies, toys, and comics!
We are looking for people to help us write news and reviews. If you are interested in helping us spread the word about some of your favorite SciFi stuff, contact us today!
Help Bubs & Hal spread the love!"

Zac


zach (1)
Originally uploaded by jedilos567.


Here is my daughters puppets. This was also made with the Project Puppet Pattern. He still needs to get dressed and I will post pictures of Him once we get his outfit on him. I helped her by just sewing a few parts for her. Since she is learning to sew. There where a few minor mistakes, but she cut out all the pieces, glued all the foam pieces. I would say 99% of the work was done by her, I am so proud.


Saturday, April 22, 2006

Can you draw?


pipis-1 copy
Originally uploaded by jedilos567.
In 1995 I drew this pictures representing my high school friends in the style of the "homies" t-shirts and figures. I don't draw to well I can copy designs. I am trying to find someone that may be able to help me re-design this drawing into a more modern look. More of a today style look. Can you help? Do you know anyone interested in doing some charity work. If you do please E-mail me. Thank you!

I moved from MSN Spaces!

Hi all! Some of you have gone to my MSN Space at http://spaces.msn.com/video567/ and I am a bit unhappy with the way it looks. I hate that you have to write your post and can't put the pictures in between the comments. All the pictures go to the bottom. They do hold 500 pictures a month and Blogger only 300. It is a small price to pay to have the look that you want.

Nose tutorial by Shawn Sorrell

Here is quick and easy way to make a nose out of felt.
First draw a circle on a piece of felt and cut it out. I used the bottom of a spray paint can here to draw my circle.
Then with a hand needle do what is called a gathering stitch around the outside of the circle. You can see how that is done in the image to the left.


You then place a bit of cotton or polyfill in the middle of the circle. The finished nose will be a bit smaller then the piece amount of filling you use since it will compact down. I always roll the polyfill in my hand into a bit of a ball to compress it a bit so the end size is closer.

You then pull the thread to gather the felt around the filler. The smaller the stitches you take in the second step the more creases you have but this will make your "nose" smoother in the long run. Once you have your nose you flip it over and hand stitch it to the puppets face. If you did not cut the thread you used to gather your circle you already have enough thread to stitch it on!


You can make other shaped noses using this same basic idea.
Information provided by: Shawn Sorrell on this forum http://puppetsandstuff.com/ and his website is located at http://wildjokerdesign.com/puppetsandsuch/index.html

Someone may get upset at this, but....

I want to apologize if anyone gets upset, but a few weeks ago my spouse left to visit family and I was home alone... So these pictures happened. I thought they would be funny and would give a laugh to my wife while she was gone. Maybe make her think twice, haha. Anyway enjoy.


Sock Puppet Part II

My daughter named him Brendon, not finished yet and I used a foam ball cut in half for his eyes, I didn't have pingpong balls and I really wanted to make him look more like Kermit. But being my first sock type puppet I really like how simple and fun he is. Will work on his arms this week, if time permits.

The Glorified Sock Puppet Pattern

So today I ordered the The Glorified Sock Puppet Pattern from Project Puppet. Here is what they have to say about their pattern:

The Glorified Sock Puppet Pattern goes back to the basics of puppet building and is the first pattern of Project Puppet's new Simple Series. But don't let the simplicity fool you! A basic sock puppet, though relatively easy to construct, can provide quite a challenge in puppeteering. A basic "sock" puppet has the ability to capture a tremendous range of emotion and can be a real challenge for the puppeteer's skills.

So far I have done everything but the inside of the mouth and arms, and then I have to personalize it. I had some green fleece and decided that it would be perfect for this new puppet. Check out the pictures to see the initial progress.

2nd Puppet Finished

My 2nd puppet using the Project puppet pattern is finished, so I wanted to post the pictures. It has no name yet, but she loves playing with Otto.


Creating a New Puppet

Well, it was that time again, we still have a little of the puppet fever and a while back I had bought this pink and orange fur at walmart. It was going to be for a puppet for my daughter, but she didn't really like it. So I used it to make another monster puppet, I still have more to go but I have done the body, head and mouth. I already sewed the arms and hands, but I am still waiting to buy some doll joints to attach them. Here are some preliminary pics.


His Name is OTTO!

Builder: Carlos (video567@gmail.com)
Pattern: The Rotondo Pattern and Fleece Head Covering Pattern (from http://www.projectpuppet.com/)

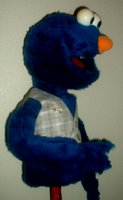
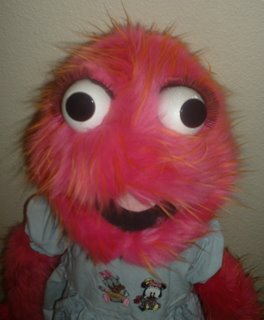
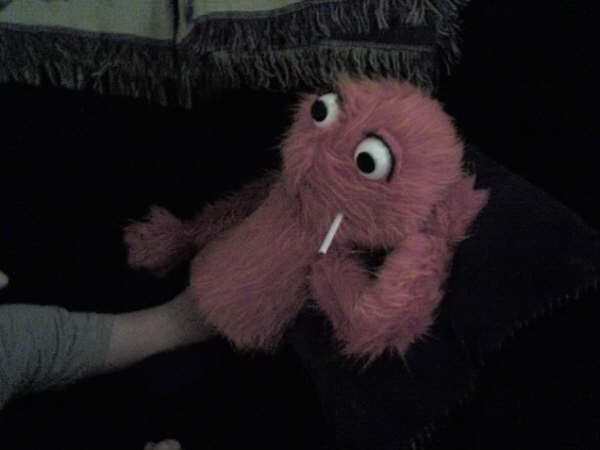
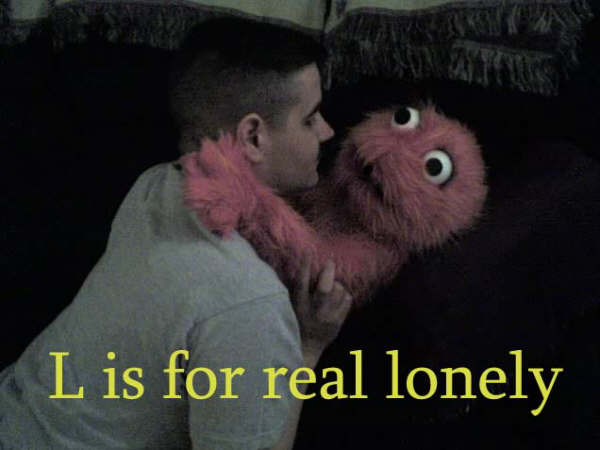
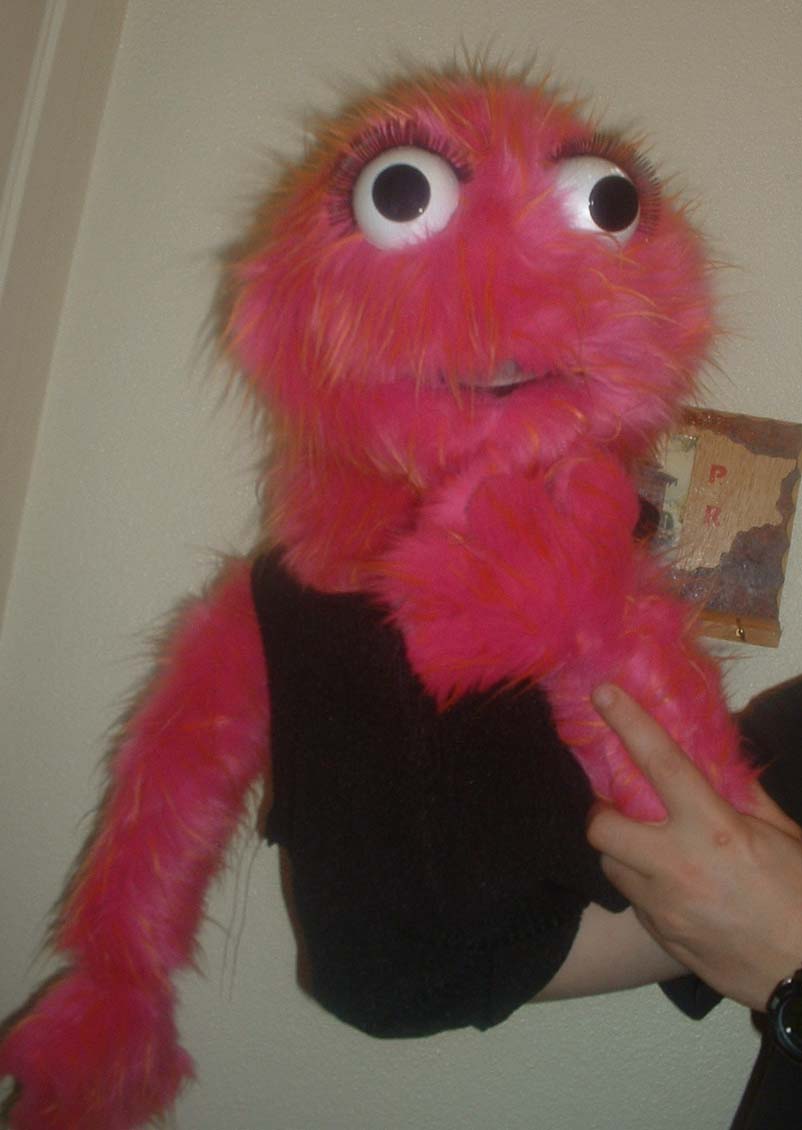
Character: After much debate and also asking a question on the muppet Central Forum called - help me name my puppet!! (http://forum.muppetcentral.com/showthread.php?t=25688 ) many of the members gave us many suggestions. The deal was that I would call them out to my 3 year old and she would choose. We finally came up with the name "OTTO". He is a monster but a nice one. The one problem we have with him is that he is always saying "Elmo had to die, because I needed his eyes!" My 3 year old always corrects him and brings out her Elmo Plush doll and point to him, telling him that Elmo is still here. He likes to talk a lot with children and

discuss their day, asks about school and what they learned. When he doesn't repeat what the children said they learned in school correctly, the children have no fear in correcting him. I don't think he is dumb. I think he does that to reinforce in children what they learned that day.

Technical: I used the pattern the way it said on the instructions. This was my first foam puppet

I wanted to make sure I followed directions 100% so I could learn from it. His skin is made of Blue fur from JoAnn's fabric it was on sale for $3.99 a yard and I used 1/2 inch foam also from the same store. It is hard to find reticulated foam in my area and since I got my pattern I wanted to start right away. The eyes and nose came from an elmo that played the guitar. It was given to me at work since I love puppets, but the arm that was attached to the guitar was cut and the electronics were broken and it would not play, I figured his donor card was filled out and he wouldn't mind donating his eyes to science. I had found some plastic doll arm hinges a few years ago and I saved them, with this puppet I used the hinges for his arms so they can move up and down also. I did not use wires for his fingers.


Update on Puppet

I started a new puppet today, I cannibalized and elmo toy for the eyes, but I used the rotondo pattern from ProjectPuppet. I had bought some blue fur at Joans Fabric and decided to use it for this puppet. I still need to attach the arms and hands. Maybe dress him up, not sure what to do with him or what to name him, but I like him so far. I think I jumped the gun on the nose but I wanted an orange nose on him and not its a little late to remove it since it is hot glued in place.


Pattern ordered and received

Well I received the pattern I ordered from Project puppet at http://www.projectpuppet.com/. Their logo can be seen here. So after working all night on it until 2 am I finally have some progress pictures. Granted I am using the wrong foam, it is too thick. But before I go an buy extra items and supplies I wanted to have a rough estimate of what I can do with it. So far I am very pleased with it. As I continue to work on this I will add more photos of the progress.